Ok, I may be the only person who is as obsessed with these things as I am, but you're here and I'm going to make you see it anyway...MWAHAHAHAHA!!
Alright, I'm back.
I got some of my first Kracie Happy Kitchen candy making kits today from my friend Kim and I was so excited to try them that I decided to make one!!
I started with the cake kit and decided I'd take step by step pictures so you guys can see just what these kits are.
So be prepared for picture spam!
 |
| What you'll need: Kit, Scissors, Water, Microwave |
 |
| Unboxed kit |
 |
| Ingredient packets |
 |
| Step 1: Cut water scoop and strawberry mold |
 |
| Step 2: Pour yellow packet into larger cake mold. |
 |
| Step 3: Pour 2 scoops of water into larger cake mold. |
 |
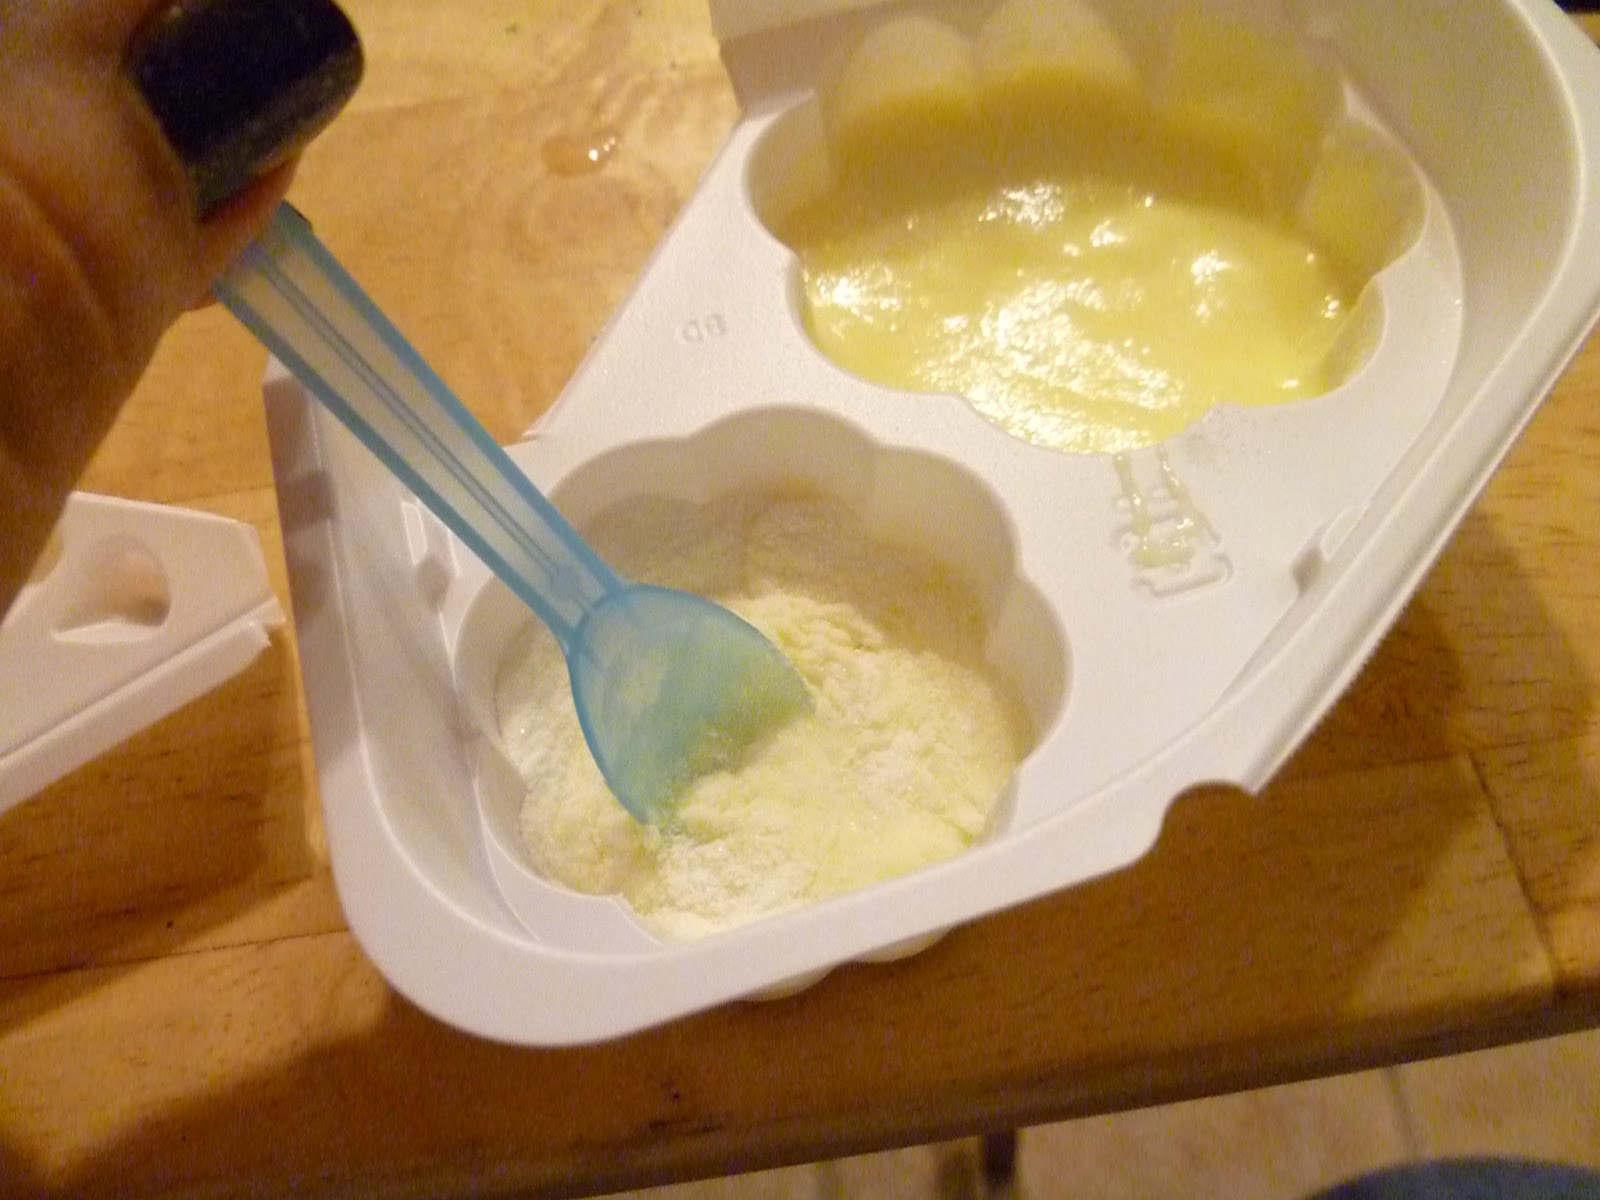
| Step 4: Mix well. |
 |
| Step 5: Pour orange packet into smaller cake mold. |
 |
| Step 6: Pour 1 scoop of water into smaller cake mold. |
 |
| Step 7: Mix well. |
 |
| Step 8: Microwave. This varies per microwave, mine took 30 seconds, but I suggest doing 15 seconds at a time until done. |
 |
| Step 9: Let cool slightly and remove from tray. Wash plastic tray. |
 |
| Step 10: Pour red packet into smaller cake mold. |
 |
| Step 11: Pour 1 scoop of water into smaller cake mold. Mix well |
 |
| Step 12: Using spoon, pour red gel mixture into strawberry molds and set aside. |
 |
| Step 13: Pour blue packet into larger cake mold. |
 |
| Step 14: Pour 2 scoops of water into the larger cake mold. |
 |
| Step 15: Mix well. |
 |
| Step 16: Frost cakes starting with larger layer. |
 |
| Optional step: Use remaining strawberry gel for cake filling, spread on bottom of smaller cake layer. |
 |
| Step 17: Frost top and sides of cake. Rinse out tray. |
 |
| Step 18: Pour pink packet into smaller cake mold. |
 |
| Step 19: Pour 1 scoop of water into smaller cake mold. |
 |
| Step 20: Mix well. |
 |
| Step 21: Scoop pink frosting into pastry bag. Squeeze frosting to the corner and snip the corner with scissors. |
 |
| Step 22: Add sprinkles as desired for decoration. |
 |
| Step 23: Add gel strawberries to the cake as desired. |
And here's my finished product!
What do you guys think?! It was so much fun! I can't wait to try the other kits!
Have you ever tried the Kracie candy making kits? What's your favorite?
Hugs & Kisses & Great Polishes!
~ Cat


Great post and pics! I'm glad you liked it :) How did it taste?
ReplyDeleteReally good actually!! The strawberry stuff was super strong but in a good way! Can't wait for the others.
Delete